

The following instructions are to help you resize, edit and/or upload an image to your website.
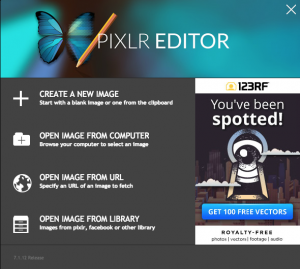
- Navigate to Pixlr.com, a free online image editing tool. You will be directed to a page that offers two options, choose “Open Pixlr Editor.”
- Your browser will guide you to a page like the one below. If your image is downloaded on your computer (saved in one of your file folders on your desktop), select the “Open Image From Computer” option.
- Your file directory will now appear and you can locate the image on your desktop, select it, and click “Open”.
- The image you selected will now appear in the Pixlr Editor.
Resizing or Editing your Image inside of Pixlr
- To crop your image, select the icon in the top left of the sidebar. Hover over your image and click and drag. You can drag the blue boxes to choose the size you desire or click inside the cropping area and drag to move the entire selection space.
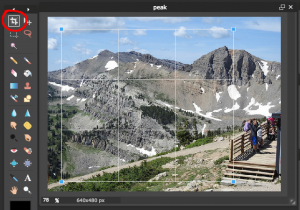
- Click anywhere outside of your selected area, and a box will appear asking if you “would like to confirm this change”. Select “Yes” if you are happy with your edit, or “No” if more cropping needs to be applied.
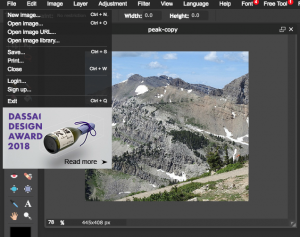
- Once your image is satisfactory, inside of the Pixlr Editor page, select “File” in the very top left corner and “Save” inside of the dropdown menu.
- Inside of the widget that appears, you can rename the image if desired. Please keep the image in JPEG format. WordPress only accepts images smaller than 10mb per file.
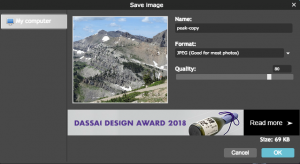
- Select “Ok” and “Save” inside of your file directory. You can now exit out of Pixlr.com.
Uploading your Image to WordPress
- Next, navigate to your WordPress site.
- Navigate to [ http://www.yourdomain.com/wp-admin ]
- (Type in your businesses website domain in place of www.yourdomain.com)
- Login: [ Username ]
- Password: [ your Password ]
- Inside of WordPress, select the “Media” page inside of the left-hand side menu.
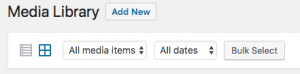
- Click “Add New” which is located next to the “Media Library” title at the top of the page as depicted below.
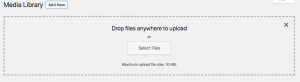
- Choose “Select Files” as seen below, then find and open the image you may have just edited or that you would like to import.
- You have successfully uploaded your image to the WordPress Media Library! You can now add this image to a page or post if you need to. Here at Gliffen, we also have access to this media for our own web building needs!
If you want to know how to insert an image into a page or post, visit our Add Photos to your WordPress Site help document. If you are having trouble navigating WordPress, visit our Making Changes to your WordPress Site help document.